Have you ever seen such an impressive thing as a photo collage, in social networks perhaps? Maybe some of your friends post this kind of artwork demonstrating their kids, pets or even nail art, and you have no idea how they make several photos stick together? Or perhaps you want to create a beautiful postcard with a picture collage for your friend, and need some easy software for that? In any case, for the best result it's advisable to use the best photo collage software available on the Web.
Now let us go step by step and learn how to make a collage of pictures.
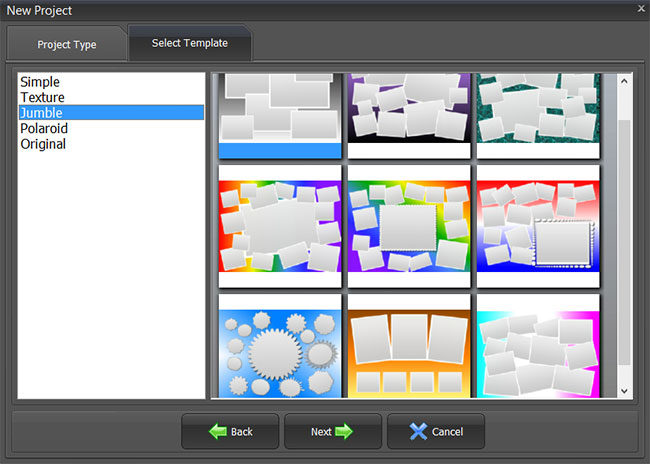
Step 1 - Choose the Collage Type and Style
Start the collage software and pick the project type. You can start with a blank canvas and create all the design yourself, or you can choose one of the predesigned collage layouts or templates with decorations. Select the design you like: it may have textured background and even thematic embellishments. Ready-made wedding, children, travel, and vintage designs can be found among the template styles.
Step 2 - Adjust the Page Settings
When you’ve decided on the style you're going to use, adjust the page size and resolution. You’ll find common scrapbook and greeting card sizes as well as A4, Letter and other paper types among the options. It's also possible to create a custom page size using the Page Editor (in pixels, inches, centimetres or millimetres). If you intend to print your collage, it’s better to select 300 dpi resolution.
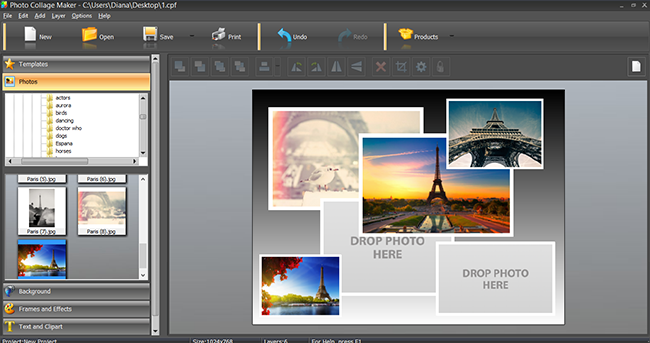
Step 3 - Add and Arrange Your Photos
How to make a collage of pictures in Photo Collage Maker? Very easy - just drag and drop the pictures where you want them to be located! If there seem to be too many elements on the page, just delete unnecessary ones by clicking on the red X on the tool bar or pressing the Delete key on your keyboard. Don’t be afraid to make a mistake - you can always undo any unwanted action. Cropping is done by clicking on the photo and choosing the Crop tool. There is also a special tool to move the layers like cards in a pile - the handy layer buttons enable you to send some photos to back and bring others to front.

Step 4 - Change the Background
Photo Collage Maker offers you a large gallery of textures and gradients for backgrounds, but you can also choose your own picture in the Background tab. Border and Frame options are here as well. Remember that the color of your photos and that of the background should contrast and complement each other. Avoid a typical mistake - using a front picture that melts into the background. You can use picture frames and masks to help your photos stand out against the background - meet them in the next step!
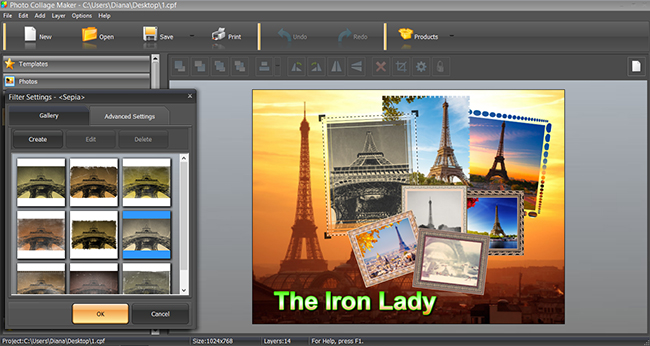
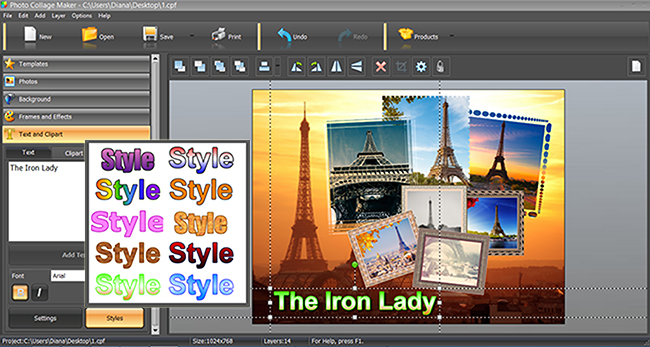
Step 5 - Frame the Pictures and Add Text
In the next tab, called Frames and Effects, you’ll find a variety of frames, masks, and filters. Choose a rectangular or a round mask to create the ragged edges effect. Filters let you colorize the photo, change its contrast, make it blurred, create "old photo" effect etc. Click on a filter and drag it onto an image to apply. A preview box will appear, letting you select the best variant. Then comes the last step of the brush up stage - add text!. Write the title of your collage, the names of the people pictured in the photos, or words of congratulations if you’re making a greeting card. Use the text styles offered or create your own if you wish.
Step 6 - Save Your Design or Print with One Click!
Click the Save button on the toolbar and save your project if you want to continue working on it later. Another option is Save As Image if you want to send the collage by email, publish it on Facebook, or maybe set it as your desktop background. You have several image type options: JPEG, PNG, BMP, TIF, GIF.

To print the collage immediately, click on the printer icon. Choose the number of copies, the paper size and page orientation, click the Print button and enjoy the printed version of the collage you created.
Now that you know how to make a collage of pictures, why not try and make your own with Photo Collage Maker? The application is available for free download, so you can give it a try right now!