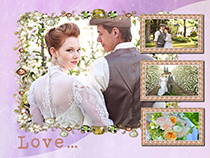
The prices that professional designers and photographers charge for album creation may be one of the reasons that drove you to the decision to make your own wedding album. The second reason might be that you want to create a customized design and know exactly the way it should be, and you are afraid that the photographer may not get your idea correctly. In these cases, the best solution is to learn how to make your own wedding album and realize the intended design yourself!
The wedding day is a magical point in time, and the photo story that you create needs to be as glorious and remarkable as the event was. This way the wedding album will be able to revive the memories and refresh the emotions. Arranging and embellishing the photos, you will as well be creating a sequence of pages that will technically represent a collage book. To create an elaborate design and fulfil your true creative potential, make sure you choose the best photo collage software.
Step 1 – Select the Best Shots for Your Album
Narrowing down the photos for your own wedding album might become the most problematic stage of your work. The fact is that a photo album with more than a hundred of pages would be quite weighty and its binding might become loose one day. The general advice is not to include any almost identical copies, poor quality, low resolution and unintentionally blurred images, photos picturing people with closed eyes or chewing something. Ask your friends to help you out – they will probably be more objective than you and your parents, and the quantity of the material will reduce greatly.
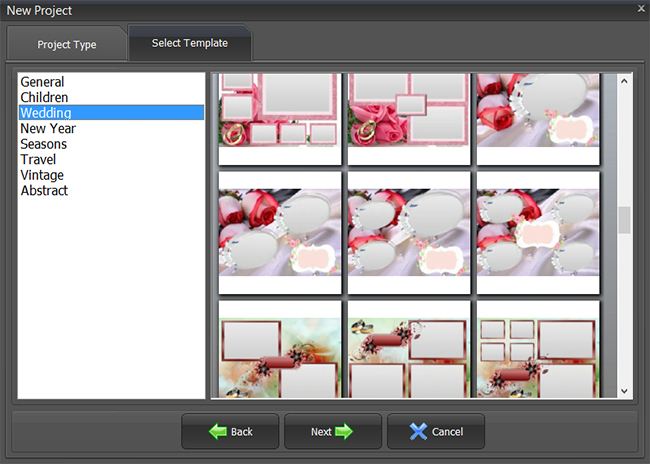
Having chosen the photos, start the software and pick a style among the Wedding Templates. While composing the album, use different template variations – with one, two or more photos per page.
Step 2 - Arrange the Photos on the Page
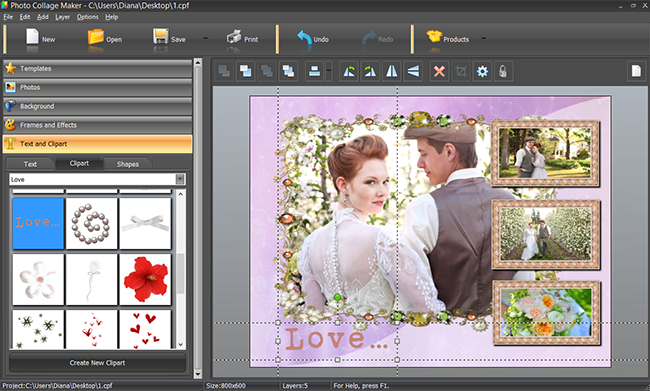
Now drag and drop the photos into the frames. Cropping is done automatically, and if you click on any image, you can move or resize it as you like holding the little control buttons on the edges. To delete an unwanted page element, select it and press the Delete key on your keyboard.
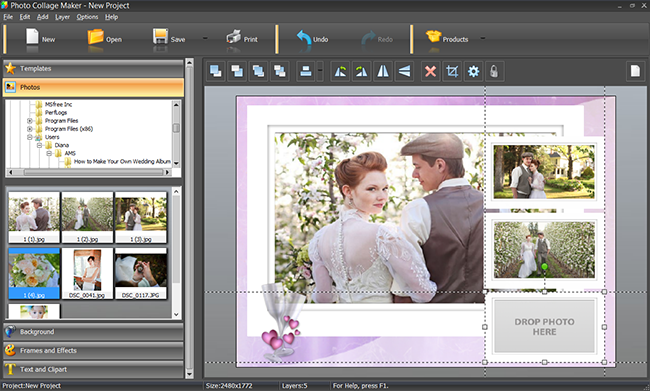
An important point is that wedding photos are always beautiful, and to preserve their visual power you should combine them wisely. Start your album with the pictures of both sides of the wedding party preparing, then add the photos of the ceremony and the reception. Pictures of small details - the rings, the garter, the wedding cake toppers - add a special charm to the overall composition.
Step 3 – Customize the Design with Frames and Effects
Open the Frames and Effects tab to discover a variety of decoration options. Add a frame to make every photo look complete and refined, or a mask to create blurred edges. There are heart-shaped and floral frames and masks in the gallery – they look great with wedding pictures.
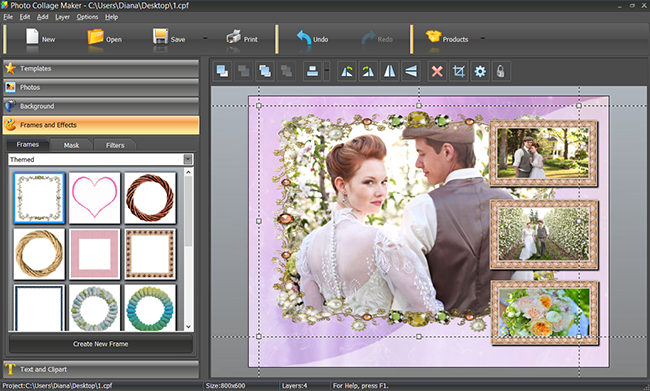
You can also apply different kinds of filters to your photos. For example, the Brightness and Contrast filter will make the photos look sharp and sunny. For an album in vintage style, try making the photos black & white with the Desaturate filter or use the Sepia filter for “old film” effect.
Step 4 – Add Embellishments and Write A Love Message
The next tab offers you a gallery of clipart embellishments that you can use if the space on the page allows that: add flowers, rings or any other love images. In addition, here you can write a caption and adjust its color and font. When you make your own wedding album, you want it to be as elegant and delicate as the bride was. Usually, italic and handwritten font types are the best options to emphasize it.
Step 5 – Print Your Wedding Album!
Now save your project (in case you need to edit it later) and click the Print icon to see the printed version of your artwork immediately. Select the paper size, choose 300 dpi resolution, click Print and touch the first page of your wedding story! If you do not have a photo quality printer at home, though, allow specialists to do it for you. Save each page as Image – now you can take the album to the print shop on a USB stick or send it there by email. You also have the option to save the custom design you created as Template - then it will be stored in the templates gallery, and you can use it to make new pages for your album any time.
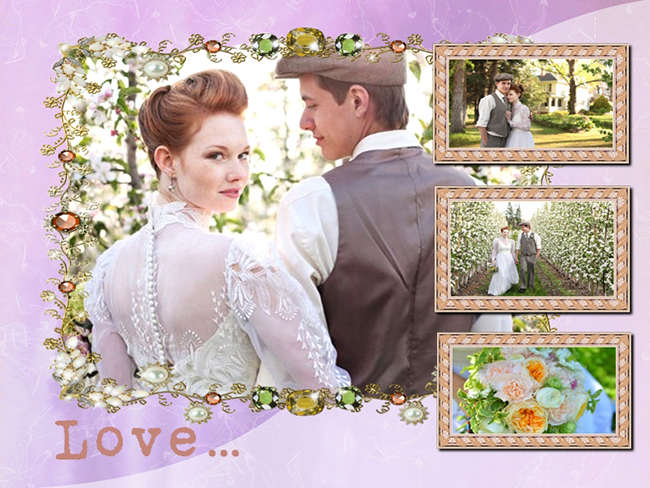
Making your own wedding album is an exciting and absorbing process, and the result may be so great that you will have to print some more copies for your relatives and friends. This experience will also help you learn how to make a photo book of your old family pictures for example.
Your wedding photos are still covered in digital dust, aren’t they? Why not give them a chance of seeing the world and becoming a part of the family treasure?


